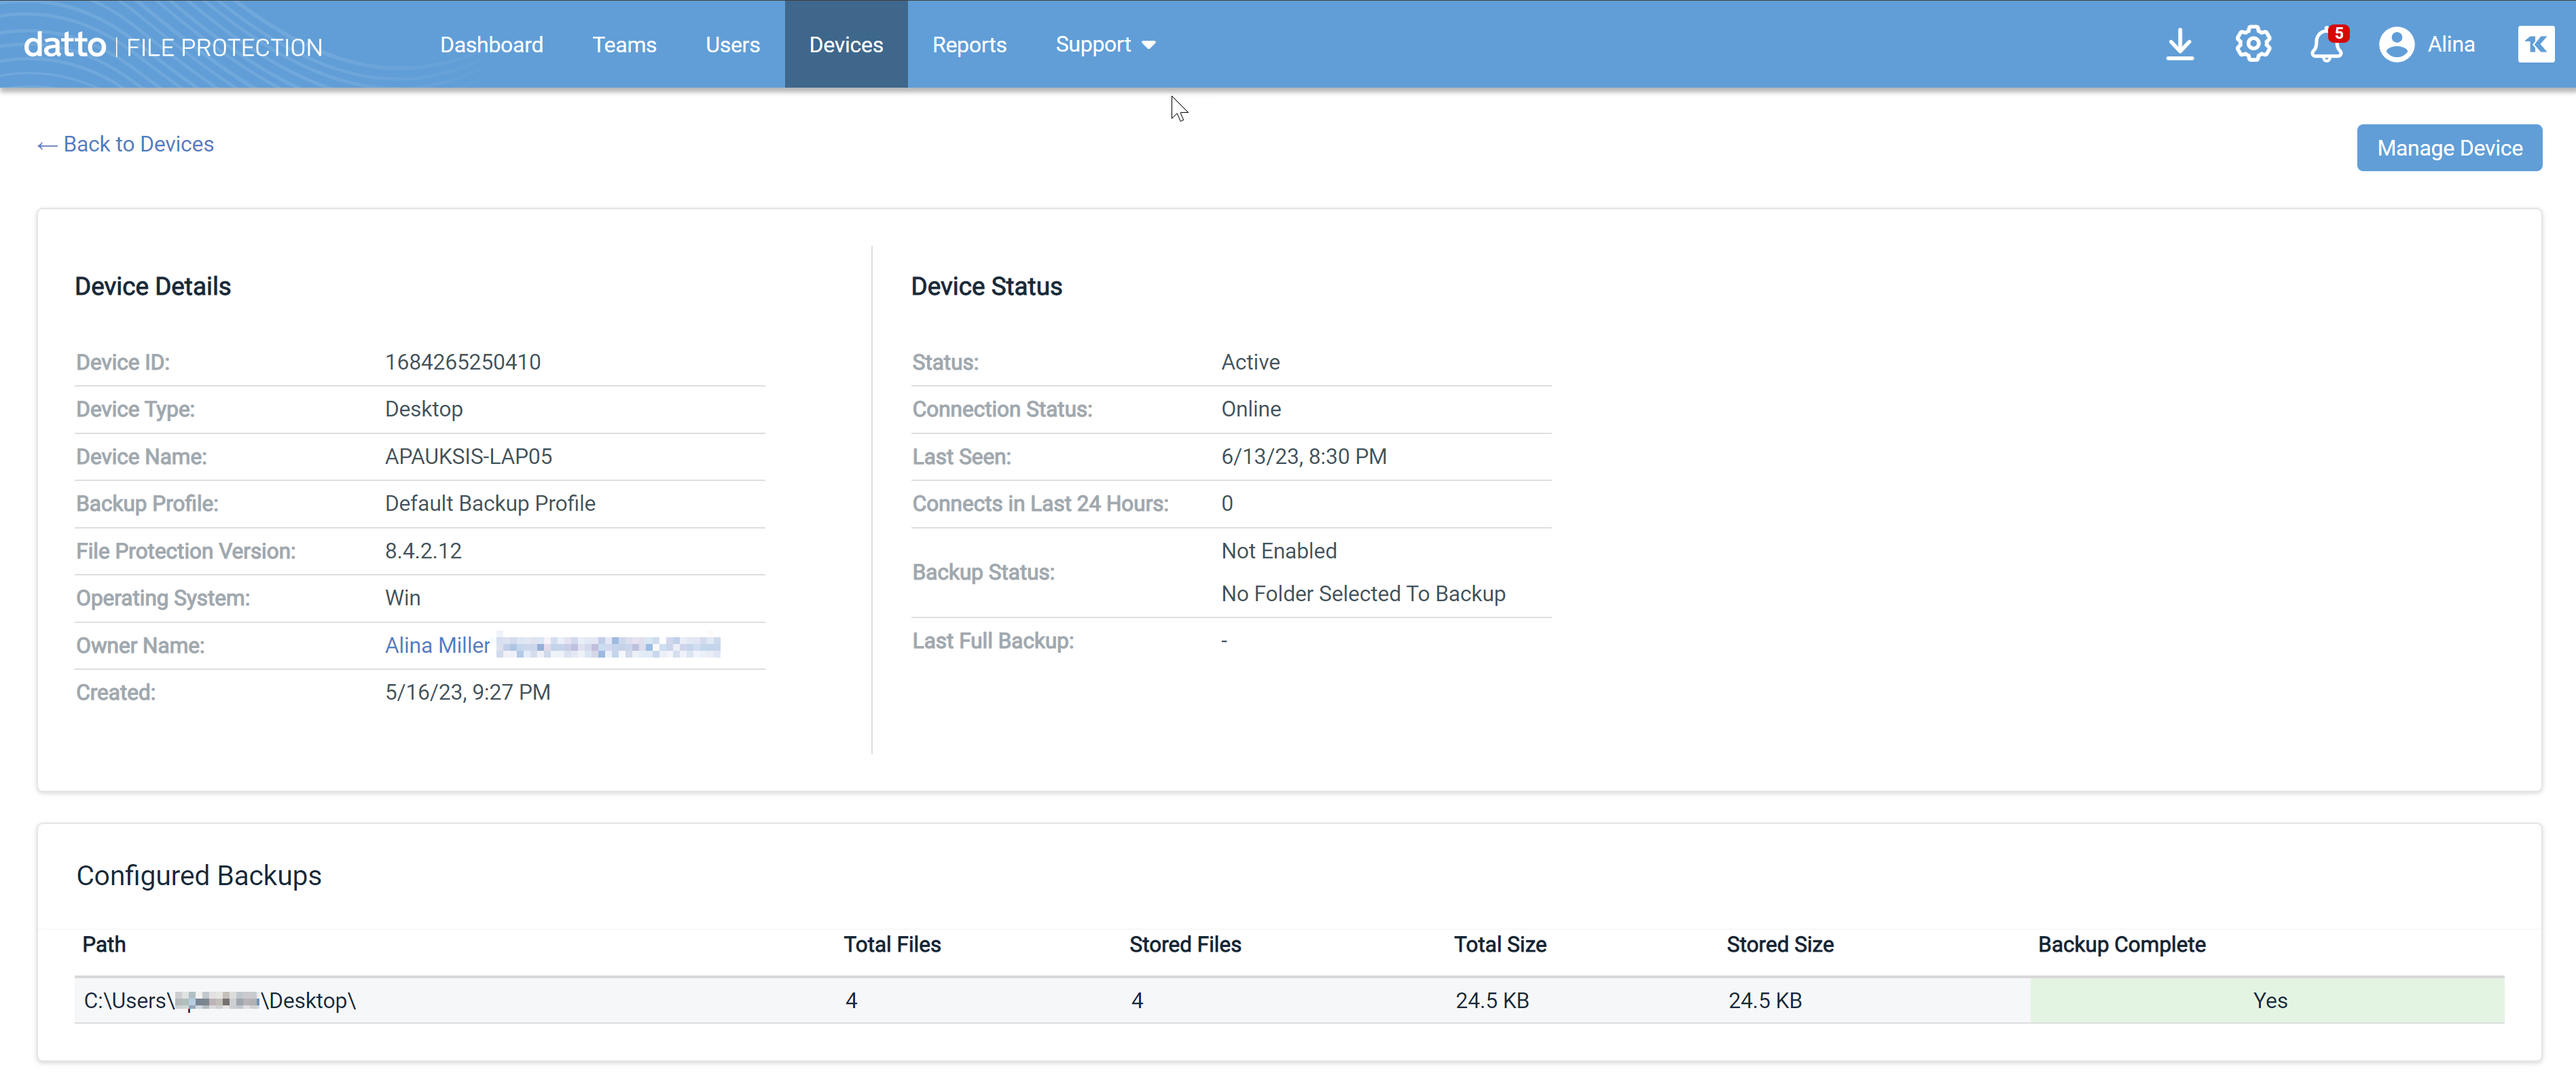
Device detail
PERMISSIONS All users (only users with Full Access or Team Access privileges in File Protection Manager will be able to manage a device)
NAVIGATION Devices > click device
NAVIGATION Teams > right click team > View Team Devices > click device
NAVIGATION Users > right click user > View User Devices > click device
NAVIGATION User Detail > click device
This page allows you to view detailed information about a device, including device ID, owner, and configured backups.
In addition, when files fail to back up within a defined timeframe or when backups are pending the availability of files, the file names and paths will be displayed here. Files showing here will automatically clear once they back up, or you can right-click and select a menu option to ignore the file in future backups.
NOTE To manage the device (including performing a device restore), click the Manage Device button go to the Device Detail page in the File Protection Online. To disable or recycle the device, go to the Devices list in File Protection Online.
How to...
Click the name/email address of the device owner. This will open the User detail page for the user.
- Click the Manage Device button.
- This will open the Device Detail view in File Protection Online.
For more information about backup profiles and how to configure and use them, refer to Backup Profiles.
- Click the Manage Device button.
- This will open the File Protection Online.
- Go to Configuration > Backup Profiles.
- Click the backup profile you wish to assign to the device.
- Click the Assigned To button.
- Apply the new backup profile. For step-by-step instructions on how to do so, refer to Assigned To.
Enter a full or partial file ID or name in the filter field. The list will update automatically as you type.
- Click the Path link.
- In the small popup, click the path you wish to filter on.
TIP You may filter the path list itself by entering a partial or full path in the field on the popup.
- To remove a path filter, click the X next to the filter item above the list.
NOTE When you exclude a file from backup using this mechanism, the file is placed on the exclusion list on the agent. As a result, if you wish to remove the file from the exclusion list, you must do so through the agent interface. For more information, please refer to Manage Backups or File Protection Server: Manage Backups.
- Locate the file in the Files Failed area.
- Right-click the file.
- Select Exclude file from Backup.
- Click the Export button.
- Click CSV or XLSX to choose your export file type.
- You may then choose to open or save the export file.


