PERMISSIONS Full Access or Team Access privileges in File Protection Manager
NAVIGATION
NAVIGATION File Protection Manager > Device Detail > Manage Device
NAVIGATION
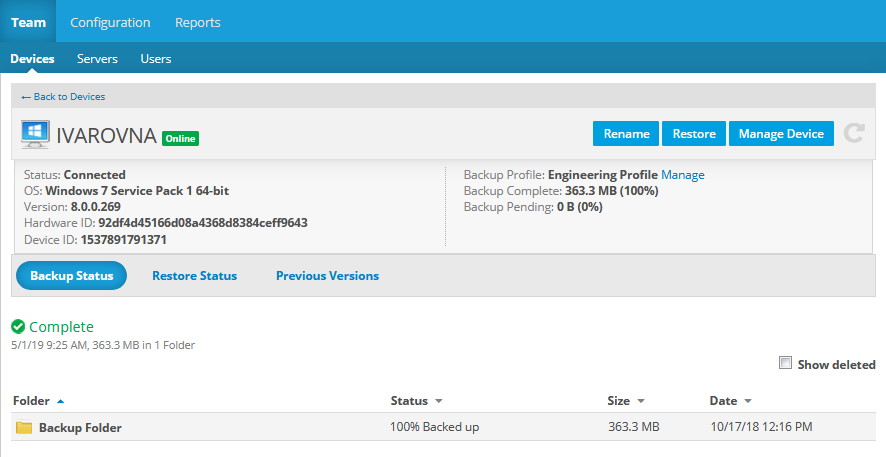
This page displays detailed information about a device associated with and provides access to several device-related functions, including disabling and enabling a device, and device data restore.
In addition to the Device Information area at the top of the page, the bottom of the page provides access to:
The following information appears at the top of the page:
| Item | |
|---|---|
| Device Name | Displays the name of the device, as well as a badge indicating whether or not the device is currently connected to the service. |
| Status | Indicates whether or not the device is currently connected to the service. |
| OS | The device's operating system. |
| Version | The version of the Agent installed on the device. |
| Hardware ID |
The unique identifier uses to associate your account with a specific device. |
| Device ID | The unique identifier associated with the instance of the agent. |
| Backup Profile | The name of the backup profile assigned to this device. Click the Manage link to open the Backup Profile Detail page for the profile. |
| Backup Complete | The size of the current backup for this device and the percentage complete. |
| Backup Pending | The size of backup still pending, and the percentage of backup still pending. |
| Available Storage (metered plans only) | The amount of storage still available for the device and the percentage of total storage still available. |
This area is displayed at the bottom of the page by default. If it is not displayed, simply click the Backup Status button to change the display.
NOTE To display items that have been deleted, select the Show deleted check box in the upper right of this list.
TIP You can sort the list by clicking the arrow icon next to a column heading.
If any files have failed backup, a warning will be displayed at the top of the Backup Status area, with a count of how many files have failed backup. For more information on files failing backup, refer to Manage files that have failed backup.
The following information concerning backed up folders is displayed in the Backup Status area:
| Column/Item | Definition |
|---|---|
| Overall Backup Status | This area displays the overall status of backups, as well as the amount of time elapsed since the last backup, the storage used by the backup, and the number of folders backed up. |
| Folder | The name of the folder. |
| Status | The backup status of the folder by percentage. |
| Size | The size of the folder. |
| Date | The date and time at which the folder was last updated. |
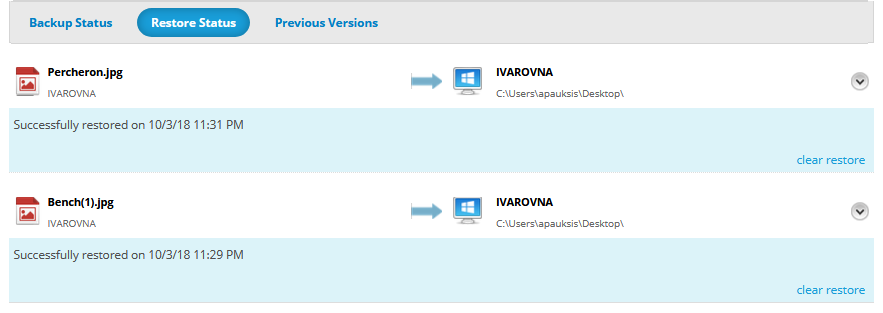
Click the Restore Status button to show this area.
The following information concerning restored files is displayed in the Restore Status area:
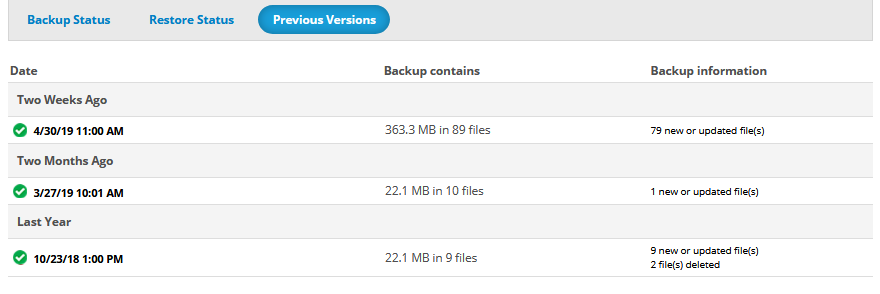
Click the Previous Versions button to show this area.
The following information (grouped by when versions were created) concerning backups is displayed in the Previous Versions area:
| Column | Definition |
|---|---|
| Date | Date and time of the backup. |
| Backup contains | Size of the backup and number of files in it. |
| Backup information | Notes the changes from the last backup. |
How to...
Click the Manage link next to the Backup Profile field in the Device Information area. This will open the Backup Profile Detail page for the profile assigned to this device.
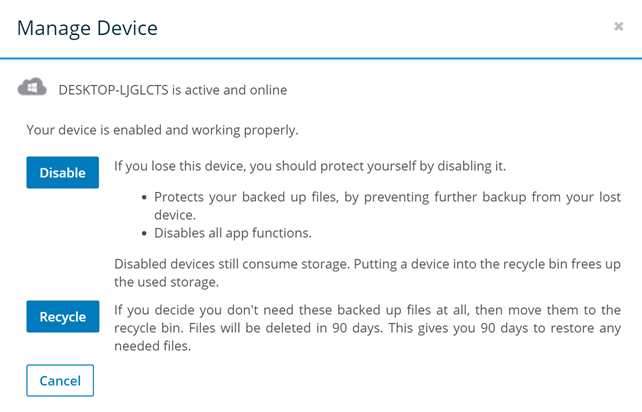
NOTE The options in this popup will vary, depending on the current status of the device as follows:
| Device Status | Available Actions | ||||
|---|---|---|---|---|---|
| Rename* | Disable | Enable | Recycle | Delete | |
| Active |

|

|

|
||
| Disabled |

|

|
|||
| Recycled |

|

|
|||
* Available only to the device owner
- Click an option to select it.
- Confirm your selection in the next popup.
IMPORTANT Disabled devices will not be able to connect to the service until enabled again.
TIP If you disable a device, it still consumes a device license. To free up the license as well as storage space from a disabled device, you must Recycle a device.
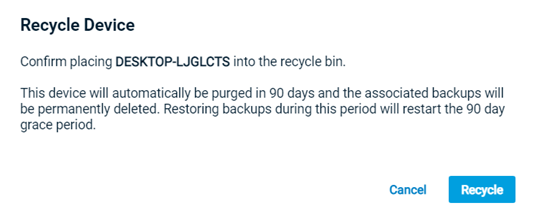
NOTE Files associated with a recycled device will be deleted after 90 days. You can restore any necessary files during this period. If you execute a restore at any time during the 90 day period, the clock starts again.
TIP Recycling a device will release the storage previously consumed by the device's data. It will no longer consume a device license.
- Click the Manage Device button.
- Click Enable.
PERMISSIONS Only
- Click the Restore button. This will open the Restore Files popup:
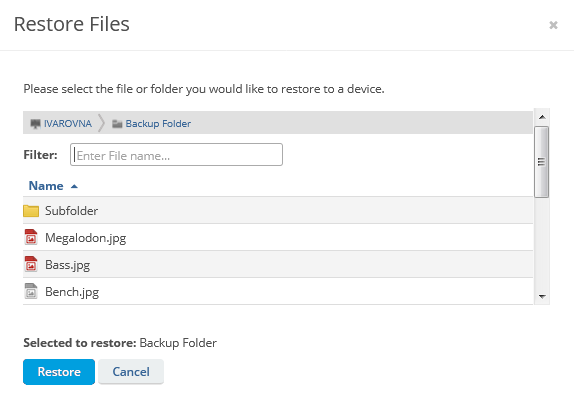
- Select the file or folder you wish to restore.
TIP Icons next to deleted files appear in gray, but can be selected for restore.
- Click Restore.
- Select the device to restore the files to, then select Continue.
TIP If you wish to restore to another device, make sure it is connected to the service and then click the Refresh button.
TIP To restore the selected files to a different user's machine, click the Change User link and select a different user.
- Select one of the following options:
- Use Desktop Folder
Downloads the backup to the Desktop folder on the selected device - Use default restore folder The folder path is displayed.
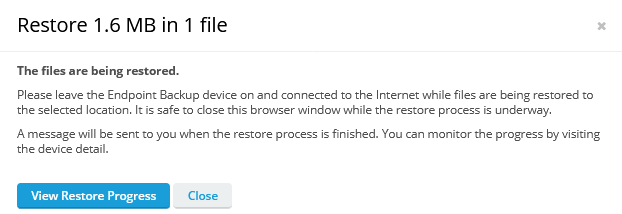
IMPORTANT The device must be on and connected to the Internet while files are being restored. It is safe to close the browser window while the restore process is under way.
- Click the View Restore Progress button to go to the Restore Status area of the Device Detail page.
or
Monitor progress in the task progress bar at the bottom of the window:
You can click the View more details link to see more information, suspend, resume, or cancel the restore.
NOTE Depending on the size of the backup, the restore time may range from a few hours to a few days. When the restore is complete a popup message will appear on the device to which the files were restored
Click one of the buttons under the device information area:
- Backup Status
- Restore Status
- Previous Versions
- Click the Backup Status button.
- Select the Show deleted check box.
NOTE This functionality is not available if all files have been successfully backed up.
- Click the Backup Status button.
- Click Manage files link at the top of the Backup Status area. This will open the Backup Status popup:
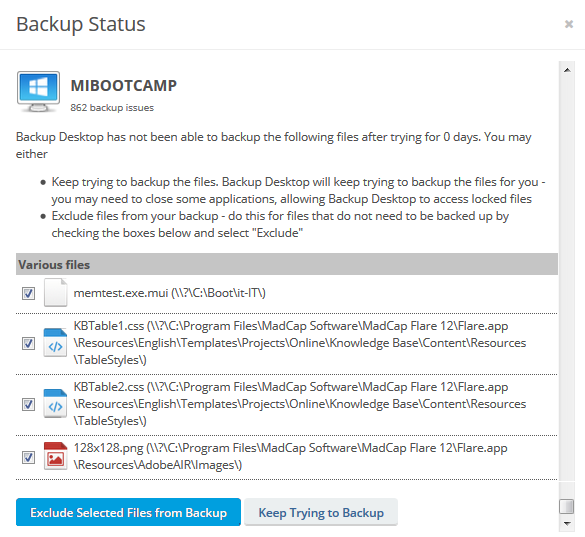
- By default, all the files that have failed backup are selected. To clear a selection, click the item. To select it again, click it again.
- Click the button corresponding to the action you wish to perform on the selected files. Your options are:
- Exclude Select Files from Backup - The service will no longer attempt to back up these files.
- Keep Trying to Back Up - The service will keep trying to back up these files. You may have to close some applications, allowing File Protection Desktop to access locked files.
- Click the Restore Status button.
- Click the clear restore link associated with the record.
- Click the Previous Versions button.
- Click a version to open the Previous Versions page with the selected version displayed.
