PERMISSIONS Full Access privileges in File Protection Manager
If you create a lot of teams, you know that it can involve recreating the same settings over and over again.
The Team Defaults page allows you to set up default backup preference, deployment configuration and alert settings that will be automatically applied every time you create a new team. You can always customize these settings for individual teams, but using this page to create backup settings and configuration baselines will save you a considerable amount of time.
Deployment Configuration
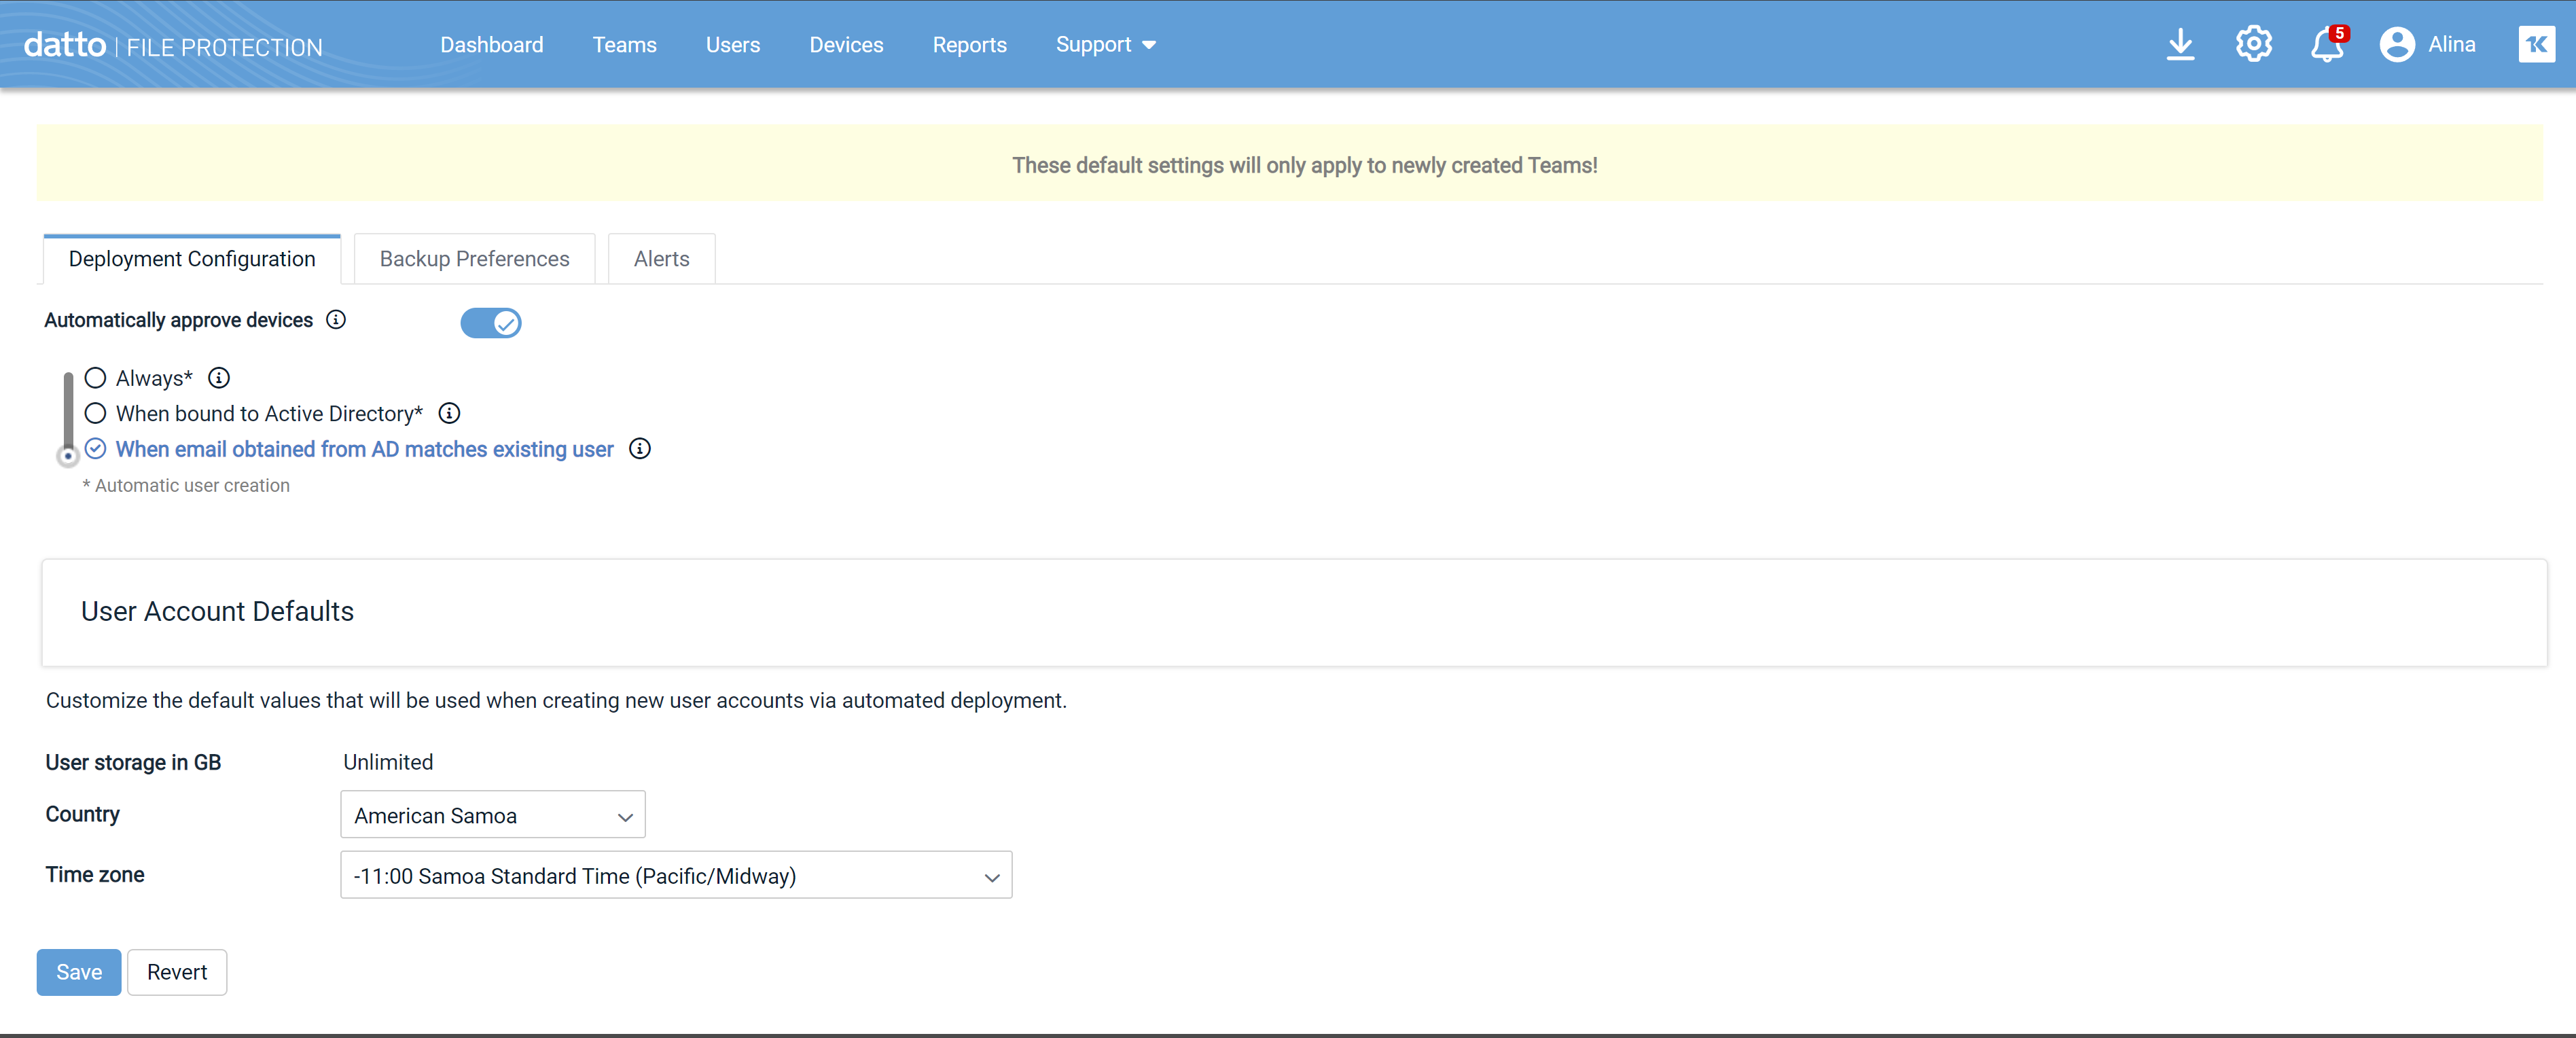
On the Deployment Configuration tab, you'll configure automatic approval preferences and user account defaults.
Backup Preferences
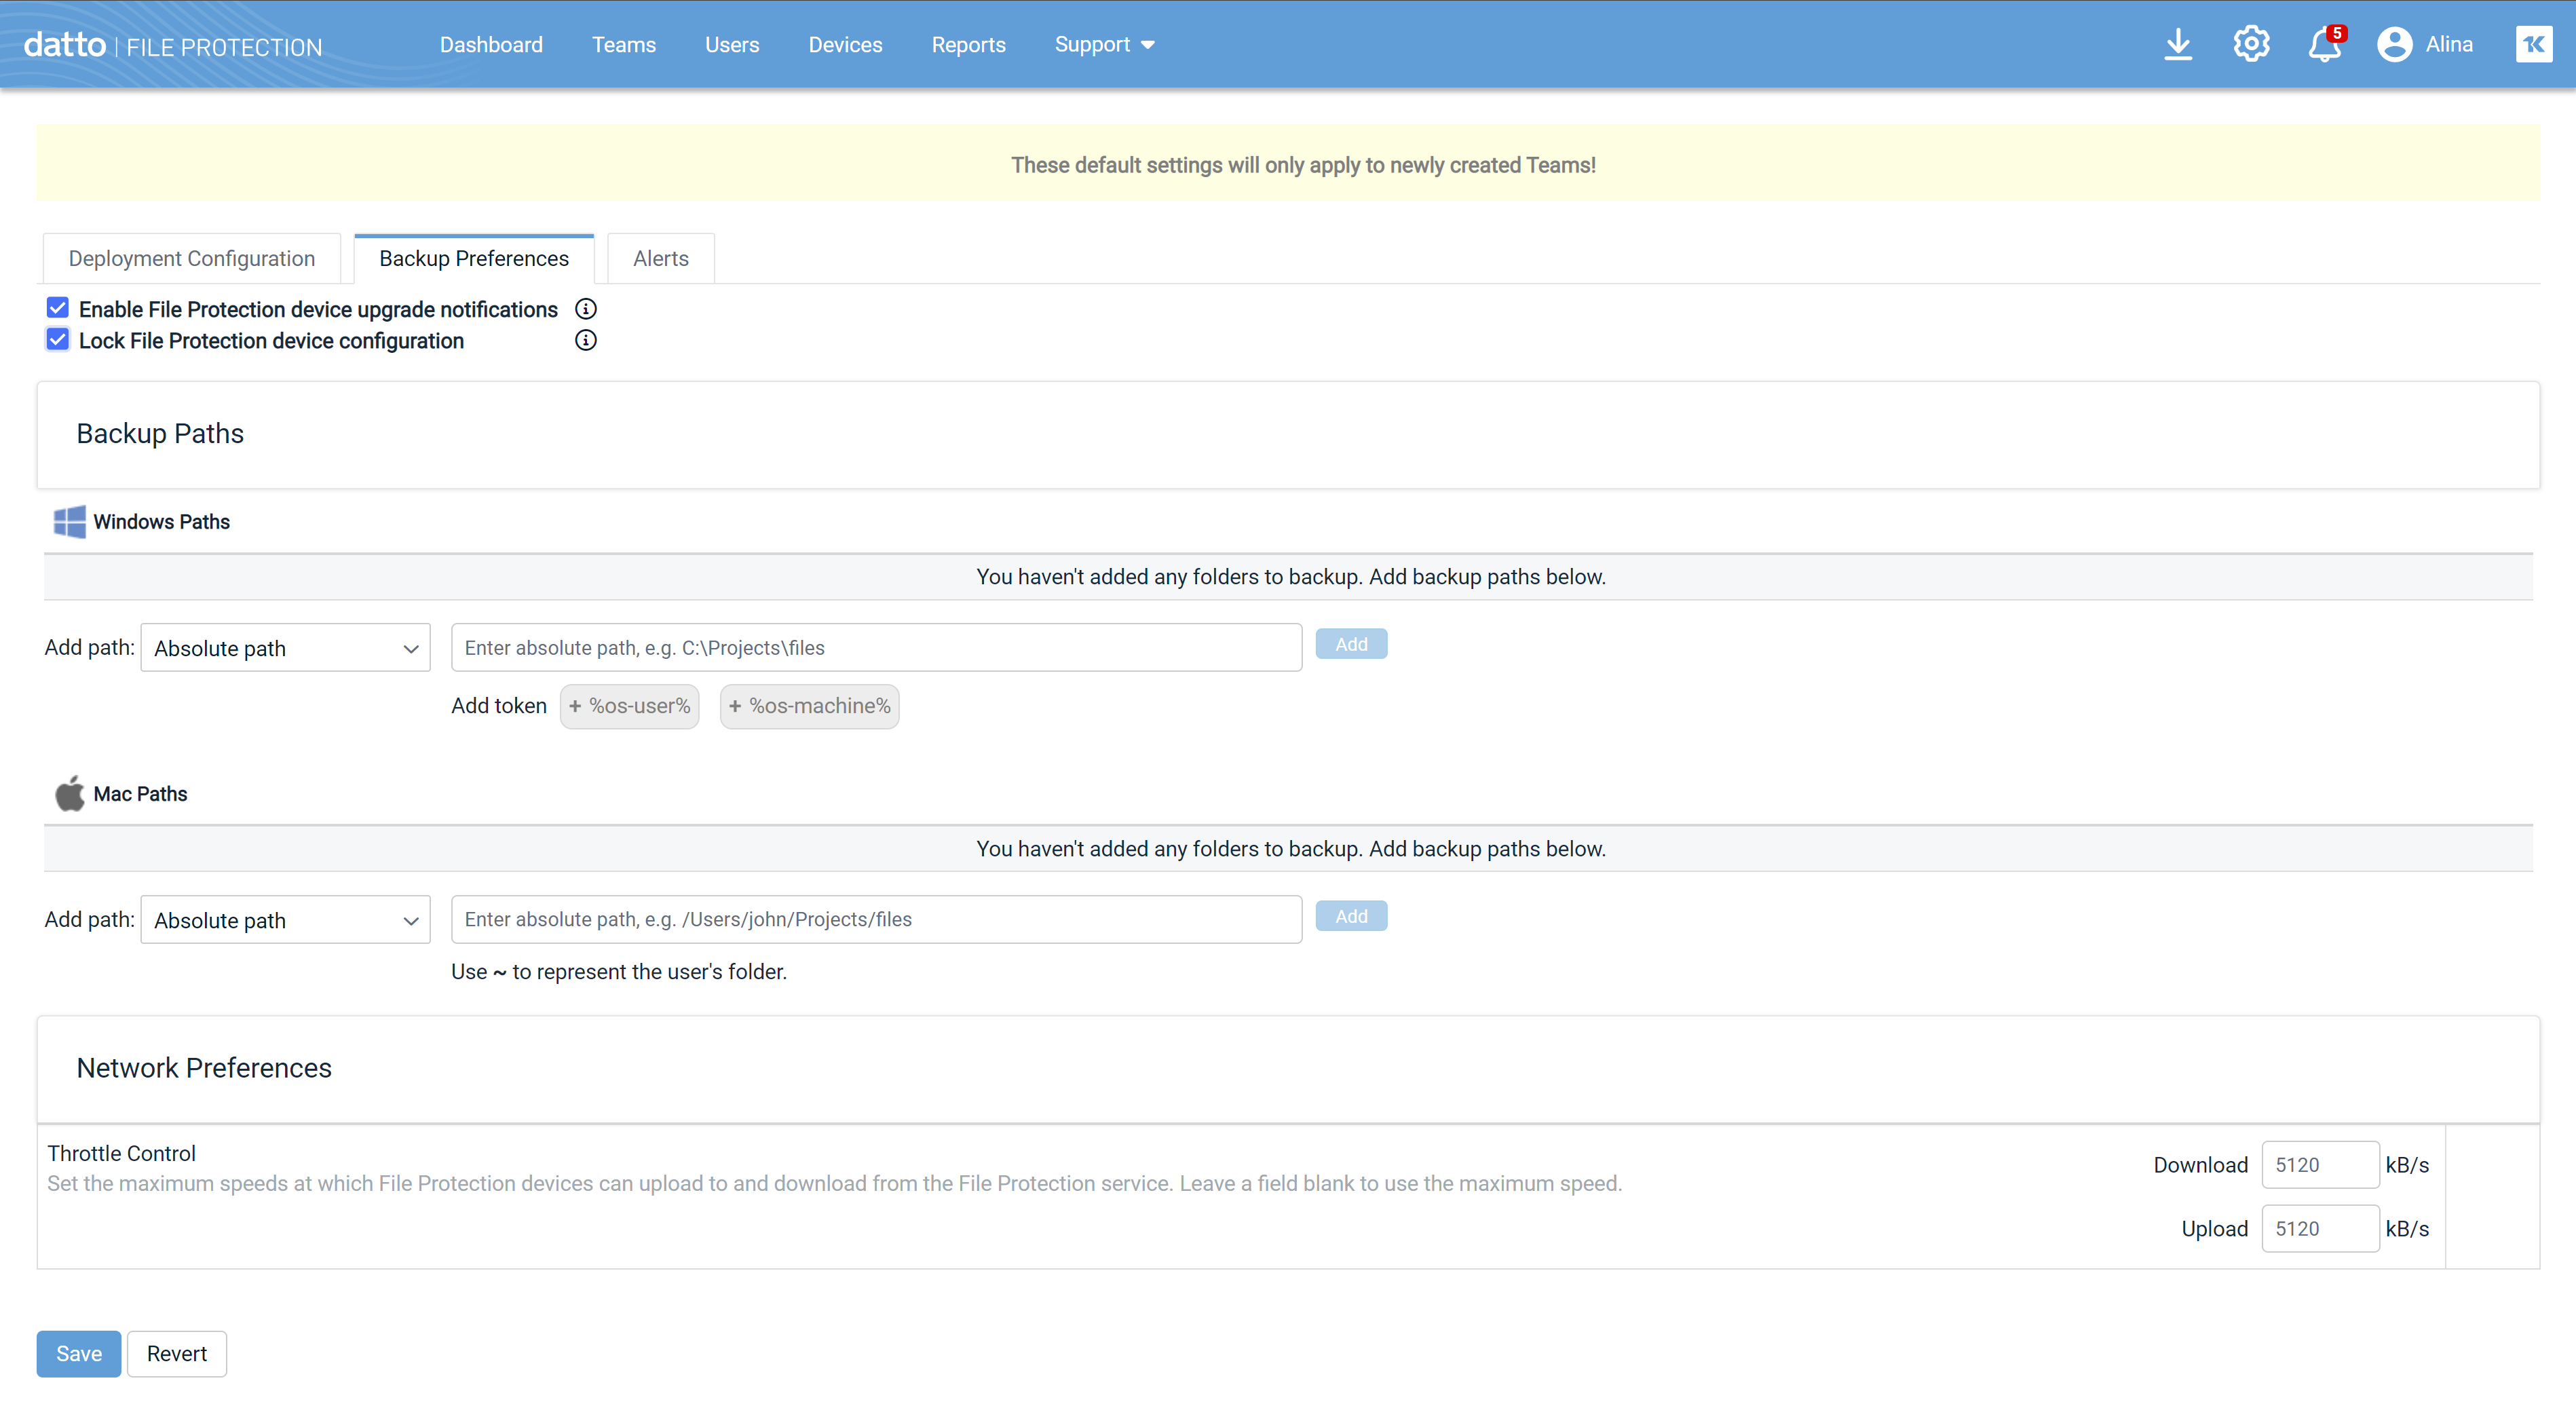
On the Backup Preferences tab, you'll configure:
- Upgrade notifications
- Whether users can change device backup settings
- Default backup paths
- Network throttle control
Alerts
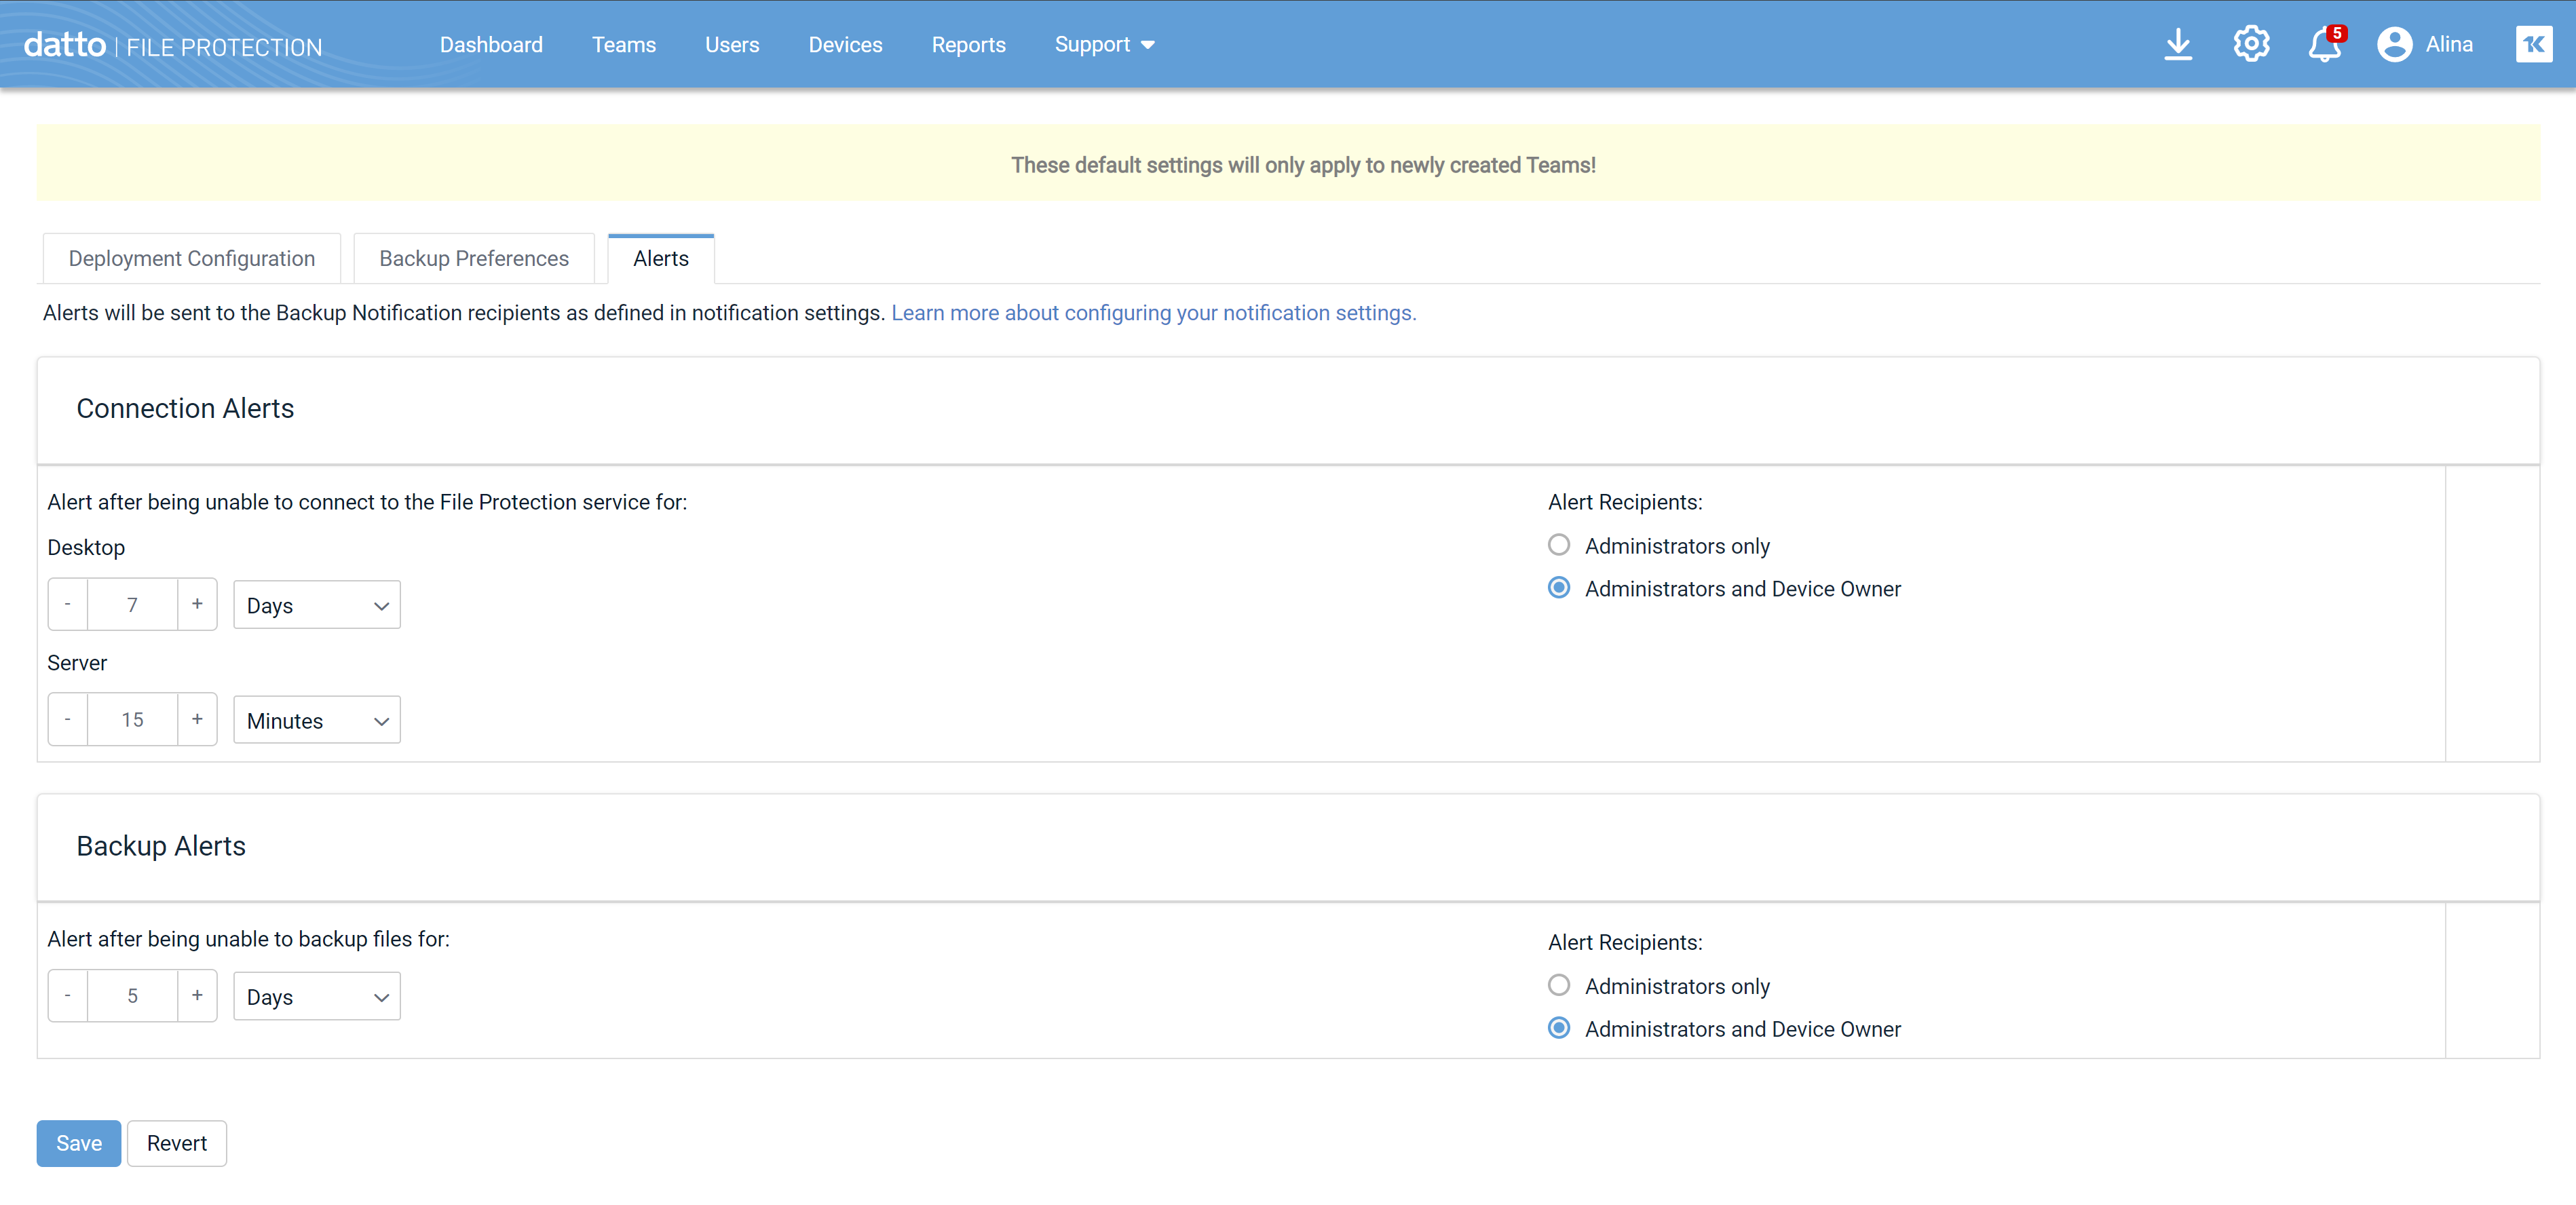
The Alerts tab allows you to set the parameters for notifications when a device is unable to connect to the service and/or files are failing to back up.
Alerts will be sent to the Backup Notification recipients as defined on the Notifications page.
After an initial notification backup alert, notifications will be resent every seven days. Offline alert notifications will be resent every seven days for File Protection Desktop devices, and every 24 hours for File Protection Server devices. Offline notifications will stop after 180 days.
The alert defaults you configure here will be applied whenever you create new teams.
How to...
- Use the following settings to determine default device configuration automation for the team:
| Setting | Definition |
|---|---|
| Automatically approve devices |
Use the toggle to enable or disable this setting. IMPORTANT When this setting is enabled, File Protection Desktop devices will be automatically approved if the criteria defined below are met, and File Protection Server devices will always be automatically approved whether they meet the criteria defined below or not. When this setting is disabled, all devices must be manually approved. |
| Always (automatic user creation) |
Slide the selector button to this setting to select it and the items below it. If the machine is bound to Active/Open Directory, the email address obtained from the directory binding will be used to automatically create an account. |
| When bound to Active Directory (automatic user creation) |
Slide the selector button to this setting to select it and the item below it. If the device is bound to Active/Open Directory and the agent is able to access the associated email address, an user account will be automatically created and the device will be approved. NOTE If you select this option and a device is not bound to Active/Open Directory, the deployment process will be manual. |
| When device information matches existing users |
Slide the selector button to this setting to select it. When the email address obtained from the Active/Open Directory binding matches an existing user account in the team, the device will automatically be associated with that user account and the device will be approved. NOTE If you select this option and a device is not bound to Active/Open Directory, the deployment process will be manual. |
TIP If you have adjusted your settings and wish to undo your changes before you save, click the Revert button. This function is not available once you have saved your changes.
- Click Save.
The defaults you configure here will be applied whenever you create new users:
- Enter or select values in the fields below. You may override the values when creating individual new users.
| Field | Definition |
|---|---|
| User storage |
Metered plan partners may use the + and - icons to increase or decrease the default amount of storage available to new users, or enter an amount manually. The default value for this field is 2GB. For unlimited plan partners, the value for this field is Unlimited and cannot be edited. |
| Country | Select the default country for new users. |
| Time Zone | Select the default time zone for new users. |
TIP If you have adjusted your settings and wish to undo your changes before you save, click the Revert button. This function is not available once you have saved your changes.
- Click Save.
- Click the Team Defaults tab.
- Select or enter the values you want to apply when you create new end users. You can set the following default values:
| Field | Definition |
|---|---|
| User storage |
Metered plan partners may use the + and - icons to increase or decrease the default amount of storage available to new users, or enter an amount manually. The default value for this field is 2GB. For unlimited plan partners, the value for this field is Unlimited and cannot be edited. |
| Country | Select the default country for new users. |
| Time Zone | Select the default time zone for new users. |
TIP If you have adjusted your policy settings and wish to undo your changes before you save, click the Revert button. This function is not available once you have saved your changes.
- Click Save.
By default, end users are not prompted when new versions of become available. This allows you to manage deployment of new versions remotely, without user interaction. Enabling upgrade notifications will prompt the user when a new version is available.
- To enable upgrade notifications, select the Enable device upgrade notifications check box.
To disable upgrade notifications, clear the Enable device upgrade notifications check box. - Click the Save button.
When you lock device configuration, end users will not be able to modify their backup folder and default backup settings (excluding network settings).
- To lock backup preferences, select the Lock device configuration check box.
To unlock backup preferences, clear the Lock device configuration check box. - Click the Save button.
-
Select Absolute Path or a predefined path.
- For Windows, optionally click a token to add it to the path. If you're unsure of what the tokens mean, hover for a tooltip.
- For Mac, Use ~ to represent the user's folder.
- When your path is complete, click Add.
NOTE You may add multiple paths.
- Click the Save button.
- Click the X icon next to the path you wish to delete.
- Click the Save button.
NOTE Throttle control settings apply to File Protection Desktop end users only. These settings do not affect File Protection Server.
- In the Download field, enter the maximum allowable download speed in kilobytes per second.
- In the Upload field, enter the maximum allowable upload speed in kilobytes per second.
NOTE Regardless of whether or not you have locked device configuration, these maximums will be the upper speed limit for all File Protection Desktop devices associated with this backup profile. If the File Protection Desktop interface is not locked, users can, via Network Preferences, reduce transfer speed, but they cannot increase it beyond the limit you've set here.
- Click the Save button.
- For each alert setting, enter a numeric value and select an interval (Minutes, Hours, Days, Weeks).
If you do not wish to send an alert in the event of connection failure, select Do Not Alert.
TIP If you have adjusted your settings and wish to undo your changes before you save, click the Revert button. This function is not available once you have saved your changes.
- Click the Save button.


