Can I back up and restore Azure files with File Protection Server?
Yes. Follow the steps and links below to back up and restore Azure files using File Protection Server.
NOTE It's possible to configure this backup using Backup Profiles, but it's faster and easier to use the process outlined below.
-
Mount the Azure file share on a drive that's accessible to the user under whose account you will run File Protection Server as a service.
-
Install File Protection Server (as described here: Install or uninstall File Protection Server) on the device.
-
Be sure to Configure the correct service permissions.
-
Go to taskbar >
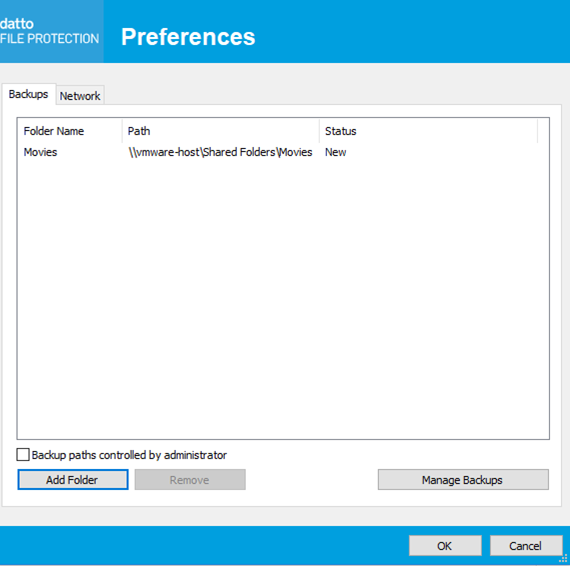
 > Preferences... > Preferences... button > Backups tab. Make sure that the Backup paths controlled by administrator check box is not selected:
NOTE If you cannot clear the check box, the Lock device configuration check box on the Backup Preferences tab on the Backup Profile Detail page has been selected and must be cleared in order for you to configure you own backups and proceed.
-
Click the Add Folder button.
-
Navigate to and select the location of the Azure files you wish to back up.

-
Click OK.
-
Backup of your Azure files will commence. To see your backups, go to File Protection Online > Team > Servers > click the instance of File Protection Server you just installed to open the Server detail page and see your backups.
-
Click the instance of File Protection Server you just installed to open the Server detail page and see your backups.
-
Follow the instructions on ho to Restore server data from backup.
-
Once the restoration is complete, import the restored data into Azure.
NOTE Azure SQL database files have "low availability" due to their nature. Because these files types are constantly being changed by multiple users, they can often fail to back up successfully even if they support the VSS mechanism (What is VSS?). Consequently, we recommend that you create a scheduled, automated snapshot (in this case, a BACPAC) within the software itself, then use File Protection to back up the snapshot.
-
Connect to the Azure SQL database in SQL Server.
-
For the database you wish to back up, go to Tasks > Export Data-tier Application.
-
Step through the process to export a BACPAC to a location that is accessible to the user under whose account you will run File Protection Server as a service.
-
Install File Protection Server (as described here: Install or uninstall File Protection Server) on the device.
-
Be sure to Configure the correct service permissions.
-
Go to taskbar >
 > Preferences... > Preferences... button > Backups tab. Make sure that the Backup paths controlled by administrator check box is not selected:
NOTE If you cannot clear the check box, the Lock device configuration check box on the Backup Preferences tab on the Backup Profile Detail page has been selected and must be cleared in order for you to configure you own backups and proceed.
-
Click the Add Folder button.
-
Navigate to and select the location of the Azure files you wish to back up.

-
Click OK.
-
Backup of your SQL files will commence. To see your backups, go to File Protection Online > Team > Servers > click the instance of File Protection Server you just installed to open the Server detail page and see your backups.
-
Click the instance of File Protection Server you just installed to open the Server detail page and see your backups.
-
Follow the instructions on ho to Restore server data from backup.
-
Once the restoration is complete, import the restored BACPAC into Azure.


