PERMISSIONS Full Access or Team Access privileges in File Protection Manager
NAVIGATION
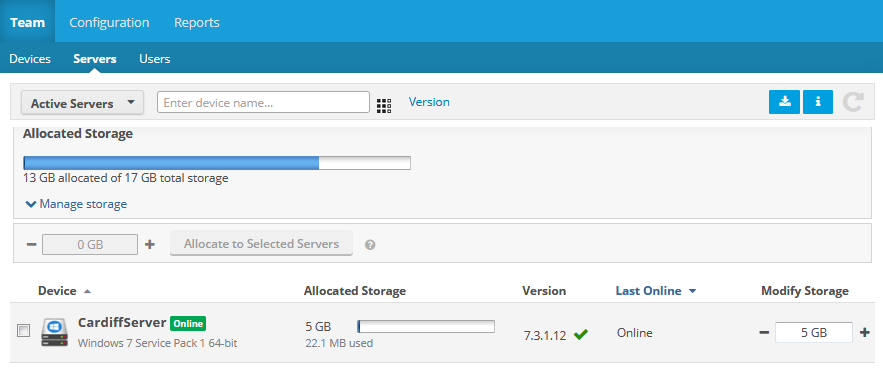
The Servers tab displays all the devices on the team that have File Protection Server installed and have been approved.
This list displays the following columns:
| Column | Definition |
|---|---|
| Device | The server name, online status, and operating system. |
| Used Storage (unlimited plans only) |
The amount of storage space currently used by the server. |
| Allocated Storage (metered plans only) |
The amount of storage allocated to the server, and the amount currently used. |
| Device ID | The unique identifier associated with the instance of File Protection Server. |
| Version | The version number of the agent installed on the device, and a green check mark if the agent version is currently supported, an i if an update is available or a red X if the version is out of date. |
| Backup Status | Indicates the current state of backup for the device, with specific backup information when available. |
| Backup Usage | The total size and number of folders in the backup. |
| Last Online | The last date and time at which the server was connected to the service or, if the server is currently connected, the word Online. |
| Install Date | The date and time at which File Protection Server was installed on the server. |
| Backup Profile | The name of the backup profile associated with the server. For more information, refer to Backup Profiles and Backup Profile Detail. |
Depending on the current status of a server (active, disabled, or recycled), different options will be available on the right-click (context) menu:
| Server Status | Available Actions | ||||
|---|---|---|---|---|---|
| Disable | Enable | Recycle | Delete | Change Backup Profile | |
| Active |

|

|

|
||
| Disabled |

|

|

|
||
| Recycled |

|

|

|
||
TIP For more information about a server, to check its backup status, or to restore from a backup, click the server to display the Server detail page. For more information about backup profiles, refer to Backup Profiles.
How to...
Click the ![]() button at the top right of the list to show or hide the Devices Licenses Summary, which is comprised of a count of server licenses, active servers, disabled servers, and servers that have been recycled. It also provides contact information should you require additional licenses. The specific information available in this pane depends on the type of plan you have.
button at the top right of the list to show or hide the Devices Licenses Summary, which is comprised of a count of server licenses, active servers, disabled servers, and servers that have been recycled. It also provides contact information should you require additional licenses. The specific information available in this pane depends on the type of plan you have.
- Click the column chooser icon next to the Filter field.
- Select the check box associated with a column to display it.
- To hide a column, clear the check box.
NOTE You may not hide the Device column.
Click the up or down arrow next to a column heading to sort items in ascending or descending order.
To reorder the columns on the server list, click a column header and drag and drop to a new location.
Select a filter from the dropdown in the upper left corner of the list. The available options are Active Servers, Disabled Servers, Recycled Servers, Deleted Servers, and Offline Servers.
You may also enter the full or partial name of a server or the user in the Filter field. The list will be updated automatically.
In addition, you can filter the server list by File Protection Server version. To do so, click the Version link, enter the partial or full version number in the small popup, then click the Filter link to update the server list.
TIP To remove the search criteria, click the  icon in the Filter field.
- Click the
 icon. This will expand the Manage Storage area, which displays used and allocated storage totals for the server.
- Click the Manage storage link to expand additional fields.
- Enter the new amount of storage in GB or use the +/- icons to adjust the amount in the Storage Allocation column.
- Click the Allocate to Selected Servers button.
- Click the Update button at the bottom of the page.
- Click the
 icon again to hide the Manage Storage area.
Use the check boxes on the left side of the server list to select more than one server.
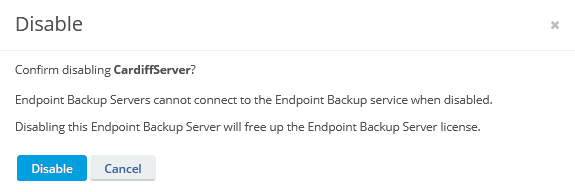
IMPORTANT Disabled servers will not be able to connect to the service until enabled again.
TIP If you disable a server, it still consumes a license and backups for disabled servers still count against storage allocation.
To free up storage space from a disabled server, you must Recycle a server
NOTE Files associated with a recycled server will be deleted after 90 days. You can restore any necessary files during this period. If you execute a restore at any time during the 90 day period, the clock starts again.
TIP Recycling a server will release the storage previously consumed by the server and will no longer consume a license.
- Click the filter in the upper left corner of the list.
- Select Disabled Servers or Recycled Servers.
- Hover over the server and click the
 icon, or right-click the server.
 - Select Enable from the menu.
IMPORTANT File Protection Server deletion cannot be undone. Please be certain that you want to delete a server before proceeding.
- Click the filter in the upper left corner of the list.
- Select Recycled Servers.
- Hover over the server and click the
 icon, or right-click the server.
 - Select Delete from the menu.
- Click Remove.
- Hover over the device and click the
 icon, or right-click the device.
 - Select View Backup Profile from the menu. This will open the Backup Profile Detail page for the device.

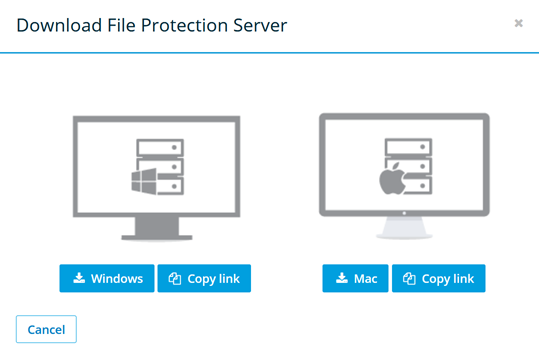
 button at the top right of the list to open the following popup:


