KaseyaOne Unified Login
NOTE To learn how to enable the KaseyaOne integration, please refer to Enabling KaseyaOne.
KaseyaOne is the customer portal and central hub for all Kaseya modules. Every Kaseya customer is provided with an account that allows you to log in to KaseyaOne and then click the product or module tile you want to open. You can also navigate to your product-specific login page to sign in to KaseyaOne.
How to...
- Log into File Protection Manager.
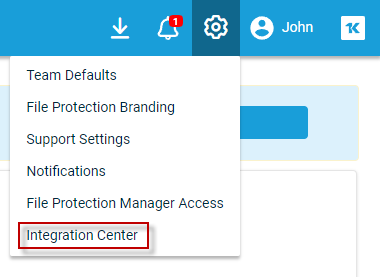
- Go to the Settings menu and select Integration Center.

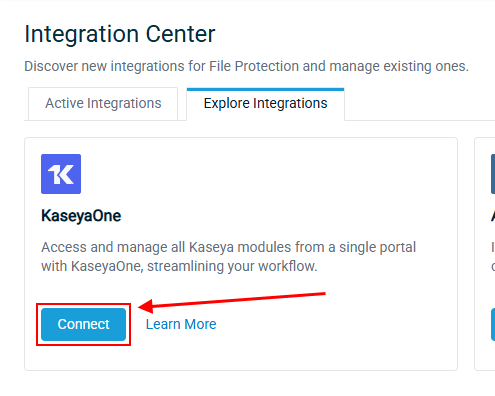
- Go to the Explore Integrations tab and click Connect on the KaseyaOne card.
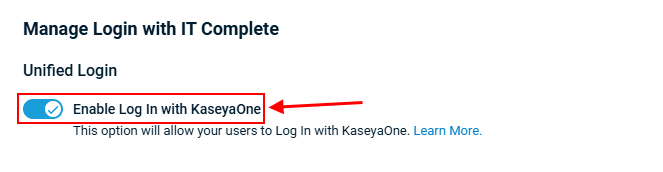
- In the Manage Login with IT Complete window that opens, turn on the Enable Log In with KaseyaOne toggle to enable the Unified Login feature, and then click Save at the bottom of the window.
- The KaseyaOne login page opens prompting you to log in. Enter your KaseyaOne credentials and then the verification code.
NOTE If you are already logged in to KaseyaOne, then you will not be prompted to log in again and your account association will be completed automatically. Wait for the serial redirects to process the load and you will be redirected back to Datto File Protection.
- After you have successfully logged in to KaseyaOne, you will be redirected back to the Datto File Protection portal.
Unified Login for Datto File Protection is now enabled and users will automatically gain access to Datto File Protection through Log In with KaseyaOne.
- Log into File Protection Manager.
- Go to the Settings menu and select Integration Center.
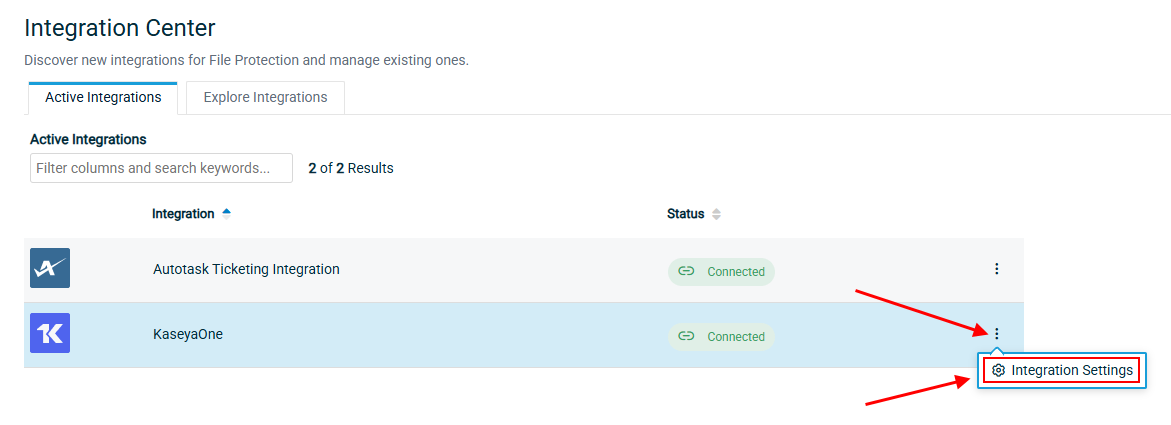
- Go to the Active Integrations tab, click the options menu and select Integration Settings. If the KaseyaOne integration is not in your Active Integrations tab, make sure you Link your File Protection Manager account to KaseyaOne.
- Turn on the Require Log In with KaseyaOne toggle.
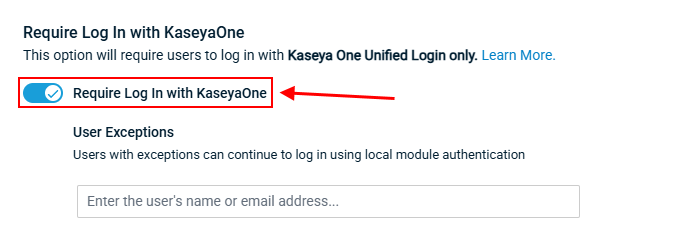
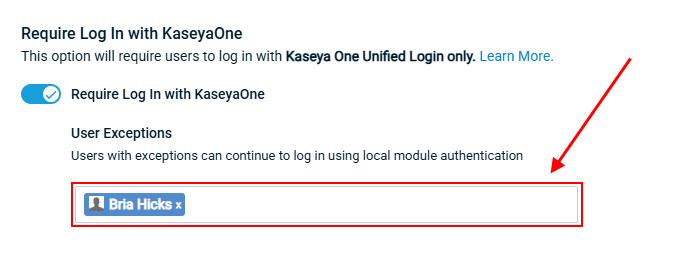
- Under User Exceptions, click into the field and type to search for the users who will be exempt from this condition — that is, they will be able to log in using either Log In with KaseyaOne or their local credentials. You can add multiple users, one at a time to this list.
- Click Save.
To enable Automatic User Provisioning for Datto File Protection, do the following:
- Log in to Datto File Protection in the usual way.
- Go to the Settings menu and select Integration Center.
- Go to the Active Integrations tab, click the options menu and select Integration Settings. If the KaseyaOne integration is not in your Active Integrations tab, make sure you Link your File Protection Manager account to KaseyaOne.
- Turn on the Enable Automatic User Provisioning toggle.
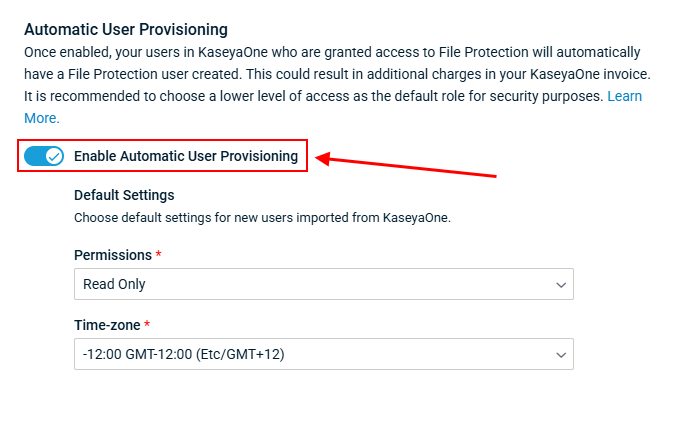
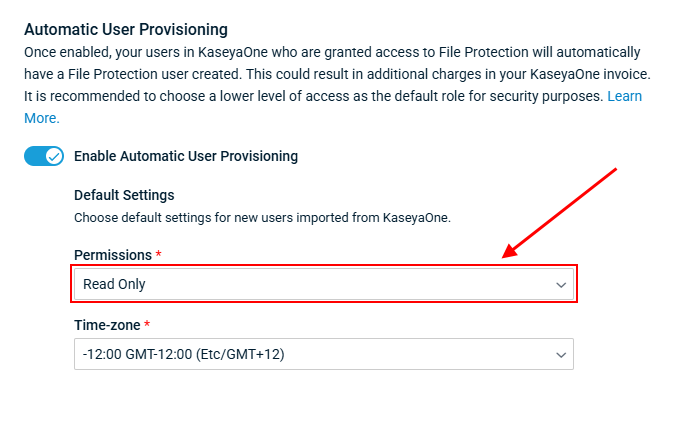
- Under Permissions, select the security level you want users to be provisioned under. It is recommended that a low level of access is given to users that are provisioned automatically for security reasons. The security level of users provisioned this way can be changed after creation.
- Under Time-zone, select the time zone you want users to be provisioned under.
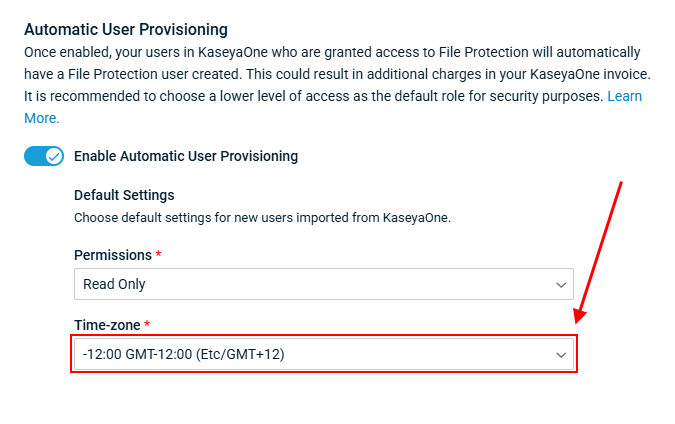
- Click Save.
- Log into File Protection Manager.
- Go to the Settings menu and select Integration Center.
- Go to the Active Integrations tab, click the options menu and select Integration Settings. If the KaseyaOne integration is not in your Active Integrations tab, make sure you Link your File Protection Manager account to KaseyaOne.
- Turn on the Enable Automatic User Deprovisioning toggle.
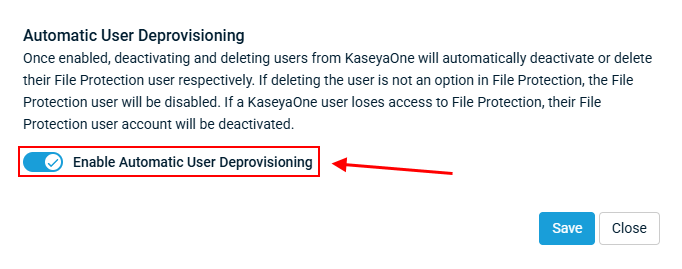
- Click Save.


