Reports
PERMISSIONS Full Access or Team Access privileges in File Protection Manager
NAVIGATION
The Reports tab allows you to report on team, device, and user activity within File Protection, and to:
- Create and save the reports that you run on a regular basis
- Schedule reports for automatic generation and email delivery
- Export reports
TIP To report on File Protection Manager activities such as team creation and management, manager user logins, and branding changes, refer to File Protection Manager Reports
About team, device, and user access reports
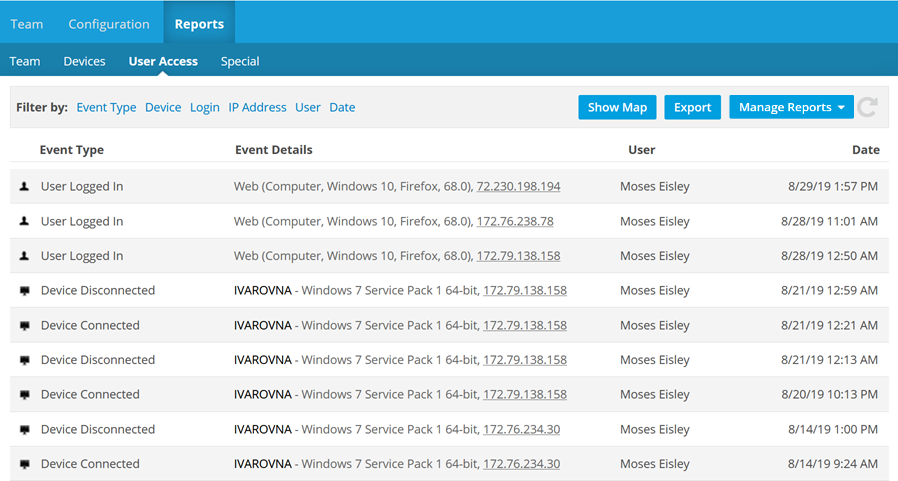
Team, Device, and User Access reports each have slightly different filters available, but they all work the same way.
Within each report type, you can use the available filters in combination to design your own report. If you wish, you can then save and/or schedule it. Each of these reports will display the following columns when generated:
- Event Type
- Event Details
- User
- Date
The filters and filter options available for each report are listed below. We've highlighted the Event Type filter and options, as these will most likely guide you to the correct report for your needs.
| Filters | Filter Options |
|---|---|
| Event Type |
User Created |
| User | Enter Filter Value (name or email) User selector |
| Date |
Today |
| Filters | Filter Options |
|---|---|
| Event Type |
Device Added Backup Restored |
| Device | Desktop Server Enter Filter Value (device name, OS, or browser) |
| File | Enter Filter Value (file or folder name) |
| User | Enter Filter Value (name or email) User selector |
| Date |
Today |
| Filters | Filter Options |
|---|---|
| Event Type | User logged In User Login Failed User Logged in (Access Link) Device Connected Device Disconnected Admin Entered Project Admin Area |
| Device | Desktop Server Enter Filter Value (device name, OS, or browser) |
| IP Address | Enter Filter Value (enter full or partial IP) |
| User | Enter Filter Value (name or email) User selector |
| Date |
Today |
About special reports
Special reports are preconfigured and require no filter selection. Three different Special reports are available: Executive, Users, Desktop, and Server. The generated special reports display the following areas/fields/columns:
Executive special report
| Section | Details |
|---|---|
| Overview |
Team name
Allocated Desktop & Server licenses Used Desktop & Server licenses Total storage & used storage |
| Users |
Username
Email address Number of Devices Storage Used |
| Server Instances |
Device Name
Status Backup Status Last Full Backup Backup Size Version |
| Desktop Instances |
Device Name
Device Owner Status Backup Status Last Full Backup Backup Size Version |
User, Desktop, and Server special reports
| Report | Column Header | Description |
|---|---|---|
| Users | User |
Name and email address |
| Devices | Number of devices associated with user | |
| Storage Allocated | Storage allocated to user (metered plans only) | |
| Backup Size | Amount of storage used when backup is complete | |
| Storage Used | Amount of storage used to store currently backed up files | |
| Last Login | Date and time | |
| Desktop | User |
Name and address |
| Device | Name and status | |
| Version | OS and version number | |
| Installed | Date and time was last installed | |
| Last Connected | Date and time | |
| Server | Device | Name and status |
| Version | OS and version number | |
| Installed | Date and time was last installed | |
| Last Connected | Date and time |
How to...
- Click Team, Devices, or User Access to select your report type.
- Click the link for the type of filter you want to use (e.g. Event Type or Date).
- In the dropdown area, either:
- Select the specific filter value you wish to apply, or
- Enter the filter criteria and click the Filter link.
- The report will refresh to display events that match the filters you have selected.
TIP You can add as many filters as you like. To remove a filter, click the  next to the filter.
TIP If you have run the User Access report, you can display a map of access events. To do so, click the Show Map button at the top right of the report. To hide the map, click Hide Map.
- Click Special.
- Select a report from the dropdown menu.
NOTE The options are Executive, Users, Desktop, or Server.
- Your report will be generated automatically.
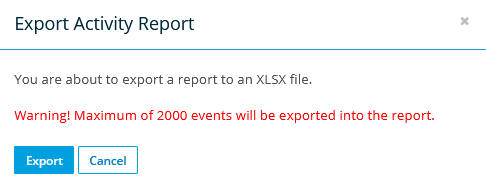
NOTE A maximum of 100,000 events can be exported. If that amount is exceeded, the report will be truncated.
- When viewing a report, click the Export button.
- If you are a Windows user, you will be prompted to open or save your report. If you are a Mac user, the report will be automatically saved to your Downloads folder.
NOTE Special reports are preconfigured and cannot be modified or saved under a different name. They can, however, be scheduled.
- Click Team, Devices, or User Access to select your report type.
- Select your criteria.
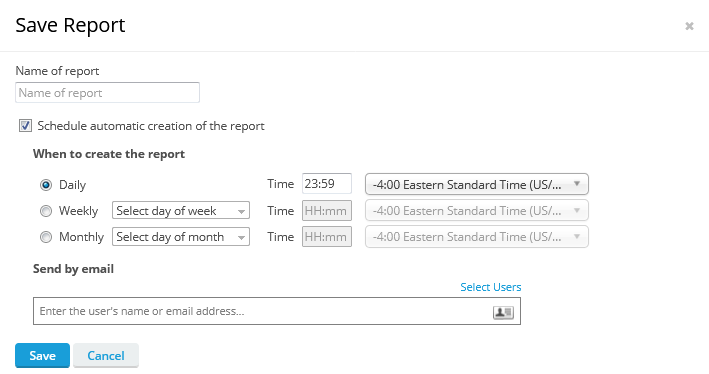
- Click the Manage Reports button and select Save Current Report. This will open the Save Report popup:

- Enter a name for your report.
- Optionally, select the Schedule automatic creation of the report check box. If you do not wish to schedule the report, skip to step 7.

- Complete the scheduling fields as follows:
| Field | Definition |
|---|---|
| Occurrence radio buttons (Daily, Weekly, Monthly) |
Select a radio button to set the report occurrence frequency. If you select Weekly, you must also select a day of the week. If you select Monthly, you must also select a day of the month. NOTE If you select a day of the month that the month does not contain (for example, a report scheduled to run on the 31st of every month will eventually run in February, which only has 28 days), the report will run on the last day of the month in that instance. |
| Time | Enter the time at which the report should be generated in HH:mm format. This field using a 24-hour clock rather than AM/PM. If you wish to schedule a report for 2:00 PM, for example, you would enter 14:00. |
| Time Zone | Select the time zone you wish to use for scheduling this report. |
| Send by email |
Click the You may select anyone on the team or any File Protection Manager user as the recipient. IMPORTANT If you do not select explicit recipients, no one will see the scheduled report. |
- Click the Save button.
- Click Team, Devices, or User Access to select your report type.
- Click the Manage Reports button.
- Click the name of the saved report you wish to run.
- Click Team, Devices, or User Access to select your report type.
- Click the Manage Reports button and select the report you want to schedule.
- Click the pencil icon
 in the upper right corner of the report.
 - Select the Schedule automatic creation of the report check box.

- Complete the scheduling fields as follows:
| Field | Definition |
|---|---|
| Occurrence radio buttons (Daily, Weekly, Monthly) | Select a radio button to set the report occurrence frequency. If you select Weekly, you must also select a day of the week. If you select Monthly, you must also select a day of the month. |
| Time | Enter the time at which the report should be generated in HH:mm format. This field using a 24-hour clock rather than AM/PM. If you wish to schedule a report for 2:00 PM, for example, you would enter 14:00. |
| Time Zone | Select the time zone you wish to use for scheduling this report. |
| Send by email |
Click the You may select anyone on the team or any File Protection Manager user as the recipient. IMPORTANT If you do not select explicit recipients, no one will see the scheduled report. |
- Click the Save button.
- Open the saved report:
- Team, Devices, or User Access > Manage Reports button > select report
or - Special > Schedule Reports button > select report
- Click the pencil icon
 in the upper right corner of the report.
 - Modify the report schedule as needed.
- Click the Save button.
- Open the report:
- Team, Devices, or User Access > Manage Reports button > select report
or - Special > Schedule Reports button > select report
- Click the trash icon
 in the upper right corner of the report.
 - Click the Delete button in the confirmation popup.


